4 Editing Tricks for Youtubers in KineMaster
Hello friends! In this post, I am going to tell you four tips and tricks of KineMaster that you don’t know at all. This post is going to be informative and useful for you, especially YouTubers and Tick. This is a very good post for talkers, so like this post and also share with your friends So let’s go to the four best tips and tricks of kinemaster.
White Board Animation in KineMaster
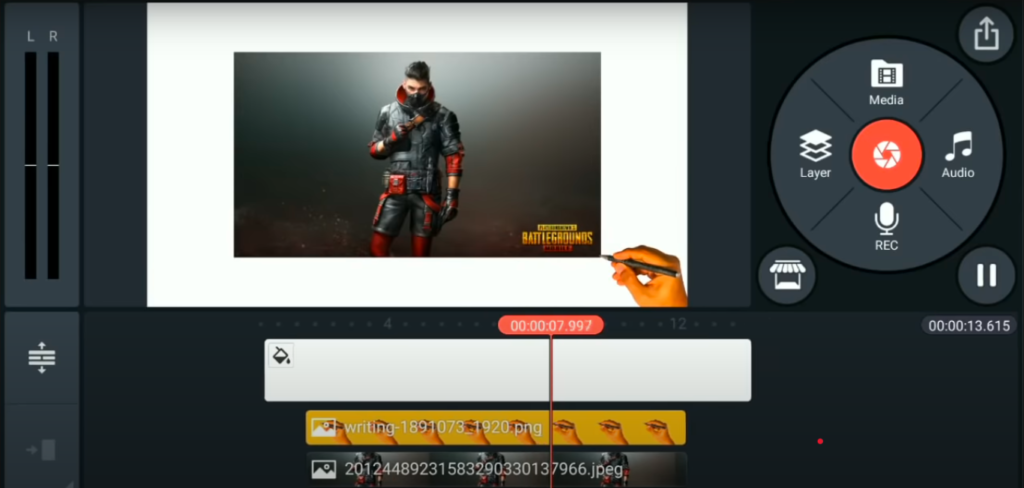
People used to use it more on the channel, but still, there is no such software. For Android, easy white board animation should be used, but still, man, in this post, if you watch e-step, you can do it easily, so guys, normally, I first added a white background. Now here I am, and I will add a photo of mine. If I add a photo here, you can add a video instead of it, and the process is the same.
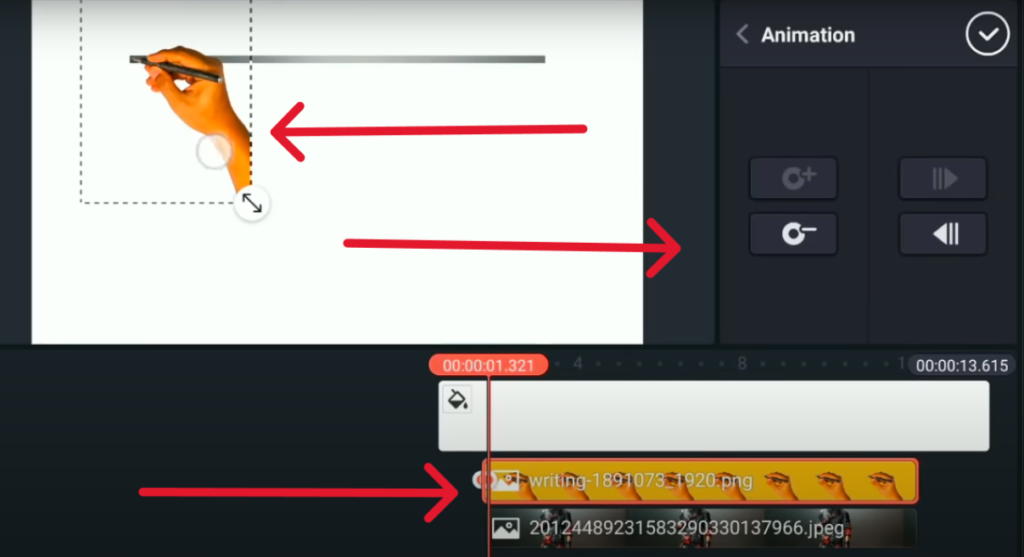
You can create a whiteboard animation. First of all, you have to give this wipe animation to the animation app. It can give you a wipedown; you can see the wipeup and the speed of the animation. At the same time, the guys will update below and will update on the layer that the hand picture is also its PNG. I will give the link in the description box, or if you search for hand PNG on Google, then you will find it easily. It will be found in this way, guys. After that, take you to the left corner of the NG.
You have to click so guys see after clicking here we have to give the animation so first guys the first one is the pan it gets automatically then guys up by directing it to the png. We have to bring it to the right side, and here we have our second one, so you can look down here, we’re going to go a little further, and here we’re going to do your third bun like this. Then this hand BNG is to bring you to the right side so this is how to process guys up I will do it quickly guys and after that I will tell you the next process.Here it is complete now here I will play it and show you something like this our whiteboard animation has been created, how do you like it please tell us in the comment section on EasyUp Investor using this hit Can create animations on Kinemaster.
Overlay Animation in KineMaster
Number two is pretty much useful for a YouTube creator who normally can use it on their videos, so you’ve seen guys who make Facebook videos, or even normally make a video with Facebook in it. If not, then the guys who record the screen give it quite well, so it is called what the guys add, after that, guys, on top of that, you have to add the screen recording of it.
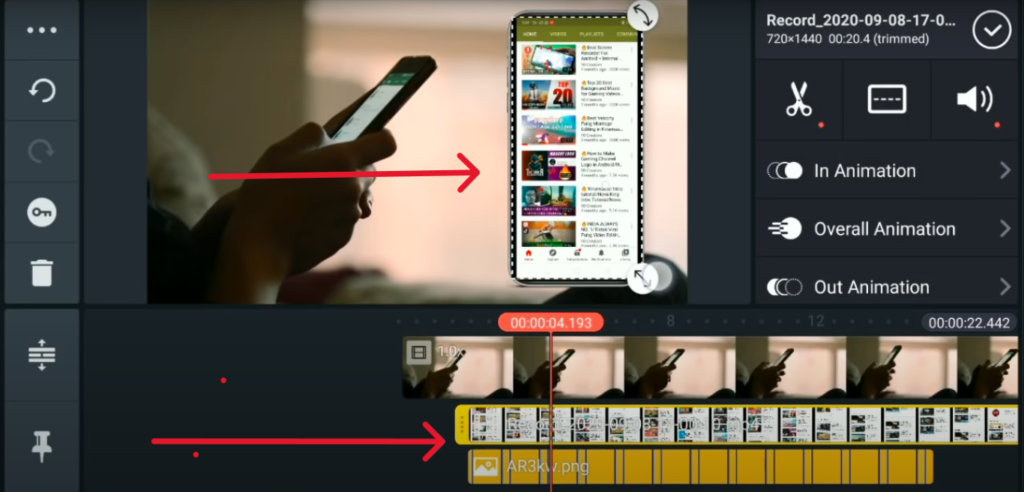
If you want to add a little cut, then I will add a screen recording here and show you first, guys. I added a screen recording of mine and dreamed it, then guys adjusted it. I’m going to give it with my phone number so here I’m going to add it to the top and bottom layers, and then it’s going to be added to the top like this so I’m going to zoom in a little bit here and then What you have to do, guys, is look at it; it has to be cropped. Now look here; below is the iPhone page, the side of which is a little curved, so first of all, you have to go to the ship and select this one from here.
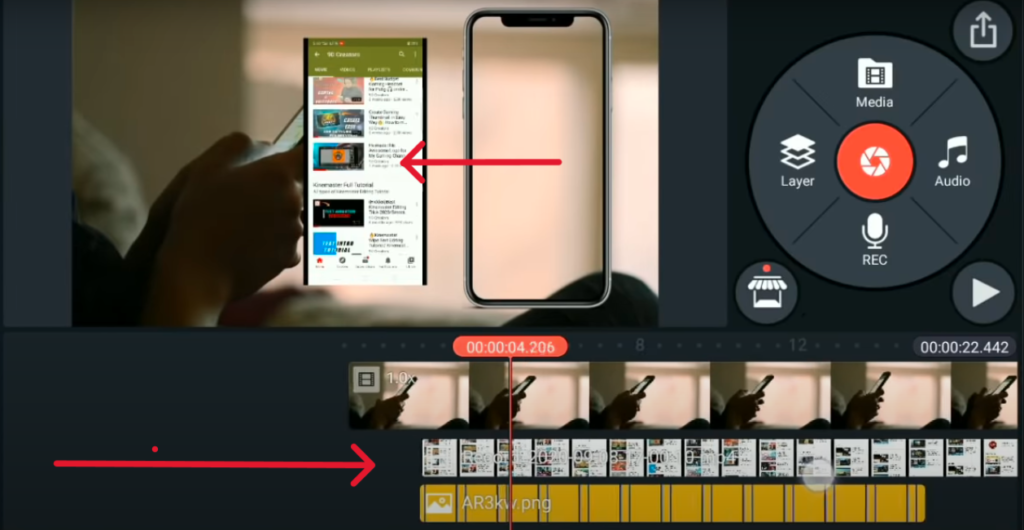
After that, the guys will click on the left button to turn it back, so the screen recording you have here will go under the PH. Now here, guys, I will show you. You can see I played it here; you can see our screen recording here; it looks like what we did on the iPhone; and the guy who is typing the left paint here is the same. It looks like it’s a single reel, okay? So you can create an overlay on your videos, and you can watch it back here, and it will look much more professional. If you want to give these animations, then guys, let me give you a peep of the animation. Look, normally, here I give 0.5 percent in animation, and here I give this light town, which is fine.
Social Animation in KineMaster
See this gays social animation, you must have seen it on my videos. If you have seen it on the same video, I liked the animation, which is normally quite professional and now only one clip. If you can do it, you can see it here. I have added a photo. If you will also add the video, then you can do it.
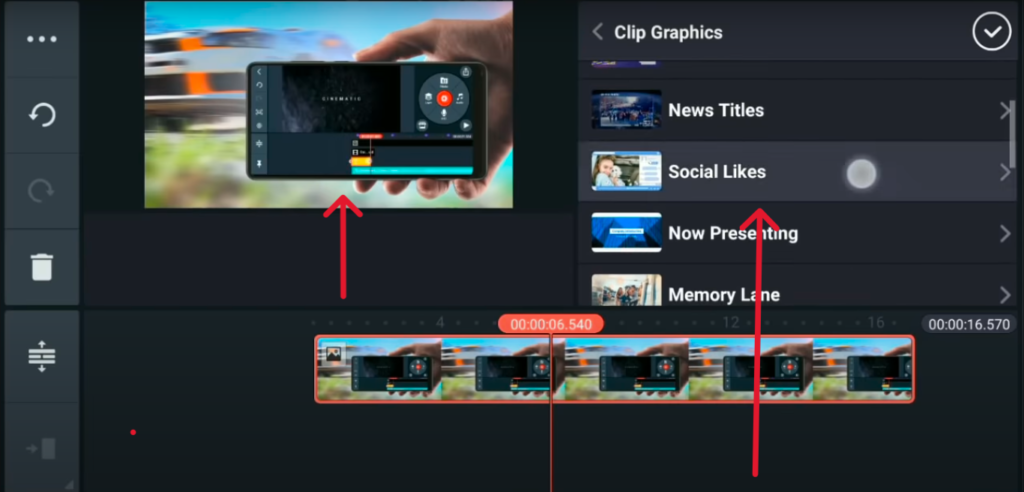
The first thing is to go and download it from your store if you have it. If not, then see here the animation that I have added. If I will play here, then here something like this is doing the animation in the middle. Here I will do the trick; I will make this plate, and after that, I will give another animation here. Go to the clips, that is, if you want to subscribe, then look here; I add the subscription in the beginning, something like this you have seen. If it happens, I do it with that. It’s quite good.
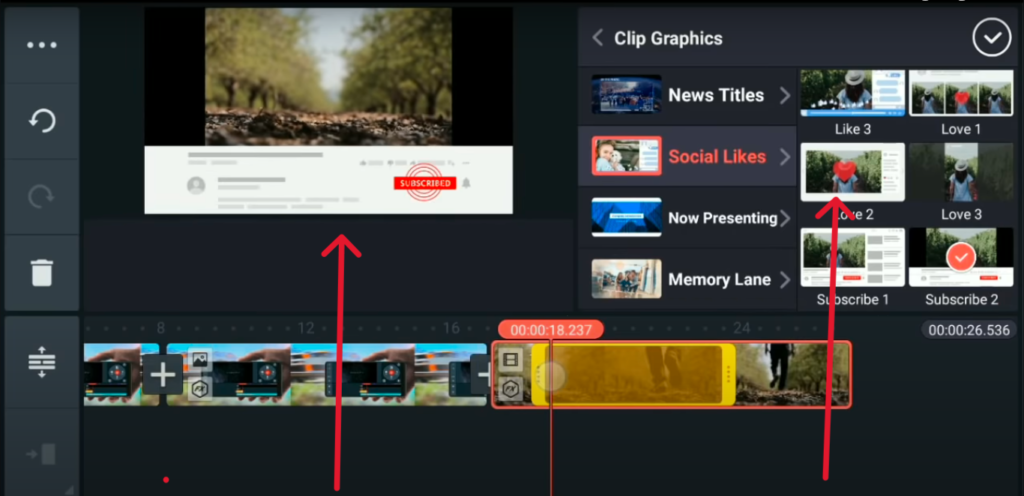
After editing it, the video sometimes appears. So, first of all, I like it here. You can see that I have edited it, and here I edit it later, guys. Subscribe. Something like this is fine. It looks very professional. Now I add it to the videos and show it. If you can add it, it’s normal. Guys, this is a video. After that, you can see the same on social media, like below. But I will add the subscription; this subscription is fine; after that, I will adjust from here. Guys, how many seconds do you want to tip? It will look much bigger, guys, when you do it on your videos.
Text Scroll in KineMaster
Let’s move on to tip number four. It’s quite easy and quite unique, guys Door Milli. You must have seen what we are talking about or we have a video like this. I am creating a text from the bottom of which you are scrolling, you will accept it, I will write it here. Please like and share and subscribe to my channel. It is ok. I have written it here. Yes, it will look a bit professional. It’s fine.
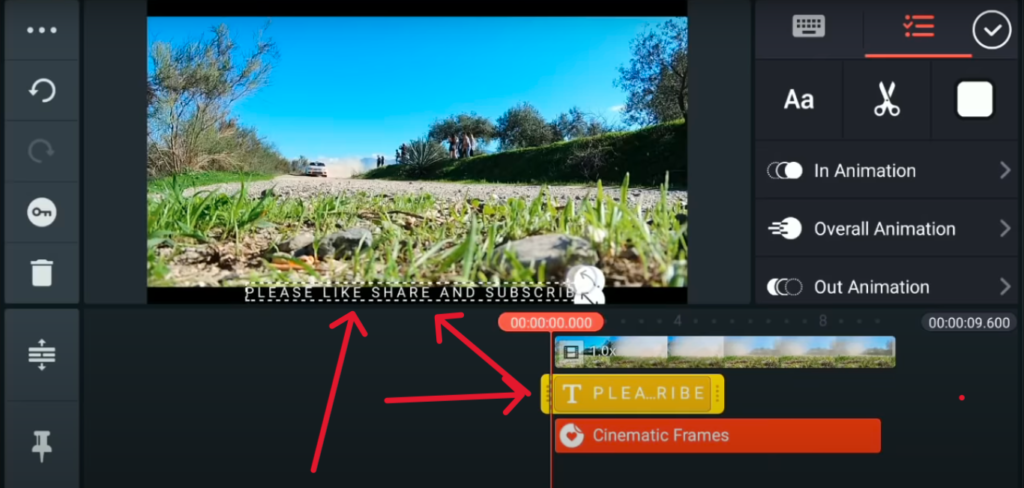
You guys should also do the same. Whatever text you write, give a little gap in the middle of it. It looks professional on Kinemaster. OK, then guys, check here. I added it. After adding this, you have to add one more thing here, that is to download Guys Sam So Frame Up from KineMaster Store, I am running here on Layer and here I am running on Top Leaper. Below you have to go to the frame and here you have to choose any frame. I simply choose the 1.8 one. You will add as many seconds as you want to the video, after that you will send it back to someone and the text you have here, guys, it will go up, so guys, you can see it here on the top of the frame.
The text is done now, and we will give this animation right to left, ok? So what to do for that? The first thing to do is to move you to the right, and the option with the key here. And after that, you have to go to the right side once. Okay, by trucking down, and this is the text, guys, you have to go to the left and hide it once. It’s done. After that, if I play it, whatever you say, you can scroll down here like this. Something like this animation gives a very professional look to your video. I hope you guys. All four teams up would love it
Final Words
These four tips and tricks are very useful and helpful. I hope you liked it. If you like the post, then share the post with your friends so that they can also benefit from it. Follow these four tips and tricks to edit your videos.
